|
* THIS POST CONTAINS BOTH AFFILIATE AND PRODUCT LINKS,
ALONG WITH LINKS TO THIRD PARTY WEBSITES MENTIONED IN THE POST.*
Welcome to the second installment of our Christmas series, Reindeer Games! In the first post, I shared the game Rudolph's Wreath Toss. Today it's Santa Beards!
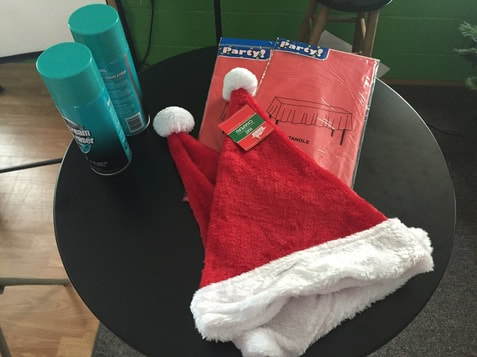
I've played this game with both high school and middle school student. When I originally post the idea, I had just played Santa Beards with my high school students and it was a blast! I'm always wondering how our students will take to games that involve a little bit of a mess, this one went over huge! Let me share Santa Beards with you. Here's what you need...
Let's Play the game...
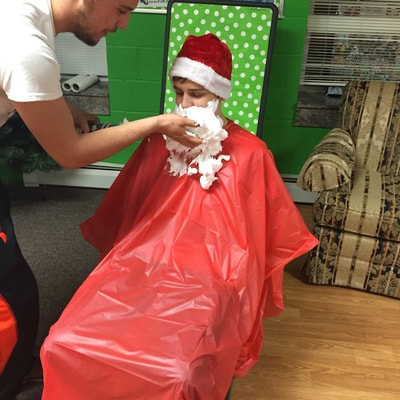
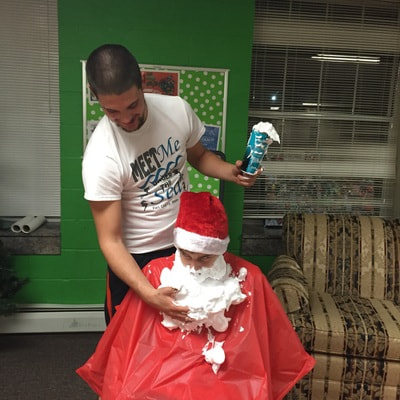
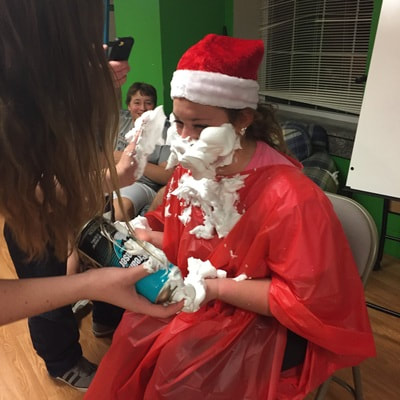
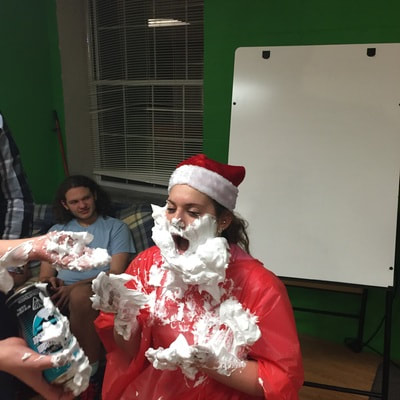
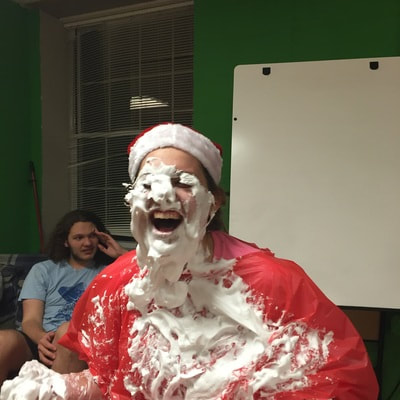
This is another simple game to play. With two teams, a guy team and a girl team (or whatever you want to set for teams), the object is to create a Santa beard out of the shaving cream. The bigger, longer, fuller, fluffier; the better! With the plastic table cloth, the possibilities are quite large. Students can create as long and as big a beard as they can! Set your time limit and go!
I was super excited that our student had fun with this one! The laughter that filled the room was pretty cool! And surprisingly, the aftermath wasn't too bad. The shaving cream stayed in our area and not throughout the church! That's a bonus.
You will want to have a few items on hand to help with the clean up. Paper towels, hand towels, and a bathroom in close proximity are things to think about. One more thought. This is not a game to play with whipped cream. Most whipped creams are oil based and might stain certain fabrics or even irritate skin. And no one wants to send students home with stains on their cloths or rashes on their faces. Stick to shaving cream because it is a water based product and washes out well, even if you get on the carpet. There you are, another simple, low cost game to add to your Christmas Game Collection! Thanks for reading! Merry Christmas! - jay
0 Comments
* THIS POST CONTAINS BOTH AFFILIATE AND PRODUCT LINKS,
ALONG WITH LINKS TO THIRD PARTY WEBSITES MENTIONED IN THE POST.*
Watch more episodes of The Youth Worker Daily Vlog...
* THIS POST CONTAINS BOTH AFFILIATE AND PRODUCT LINKS,
ALONG WITH LINKS TO THIRD PARTY WEBSITES MENTIONED IN THE POST.*
Tis the season for colored lights, pine trees, candy canes, and so good fun Christmas-themed ice breakers! That's right, youth worker, Christmas is here, and that means we have a chance to bring out some of our favorite Christmas-themed games!
This week I am reposting a few of my most favorite Christmas-themed games for students. So if you're looking for some last minute holiday game ideas, here you go!
During the holiday season, one of my favorite places to shop in my local dollar stores. I visit these stores and wander through the holiday aisles looking for ideas, particularly game ideas. A couple of years ago, while shopping, I found everything I needed for three of my favorite Christmas Ice Breakers! So let me refresh these old posts and let's share with you a few Christmas Games.
I call them my Reindeer Games, and I spin as a games Rudolph and his buddies might play way up north! I'll share the game and the directions, and provide a materials list along with any other tips or tricks to make the game successful. Let's kick off our Reindeer Games with our first game, Rudolph's Wreath Toss! I love Rudolph's Wreath Toss. I've played this game a number of times and it is always a huge success! Based on the tradition Ring Toss game we've all played as kids at our birthday parties. This is a super easy, super low cost game to play. Here's what you'll need...
Materials List:
Let's play the game...
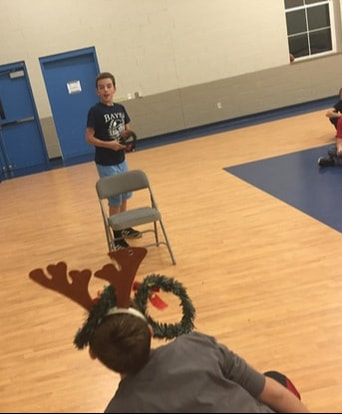
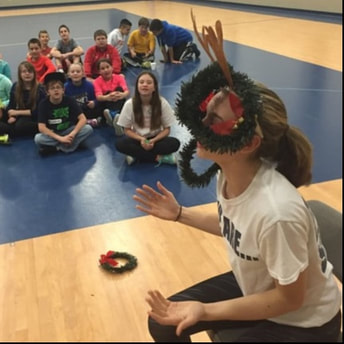
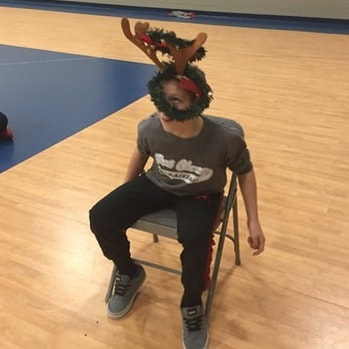
So the game itself is pretty simple. Like the party game, the object is to toss the ring wreaths and land them on the antler or antlers atop the receivers head. Here's what I did.
The night we played this came we ended up with a tie. In our challenge, the girls were ahead in the points. So since both teams landed 5 rings we had an "all or nothing" tie-breaker. Each team was given 3, and only 3, rings which they were to toss one at a time. After they tossed their rings, it was over. No re-do's or second chances. If a ring hit it's mark, a point was given. If all three missed, that meant the end of their game.
The girl's went first. Three rings. Three tosses. Three misses.
Then it was the guys turn. The first toss was a miss.
The second almost landed...but fell off. The third...A RINGER!!!! The guys went nuts!!
Simple. Easy. Low cost. And, Rudolph's Wreath Toss was a huge hit!
Be sure to check in again later this week for our second installment of the Reindeer Games series. Thanks for reading. Please feel free to share the article with your friends, but please include a link back to this post in your shares. Merry Christmas, friends! - jay
* THIS POST CONTAINS BOTH AFFILIATE AND PRODUCT LINKS,
ALONG WITH LINKS TO THIRD PARTY WEBSITES MENTIONED IN THE POST.*
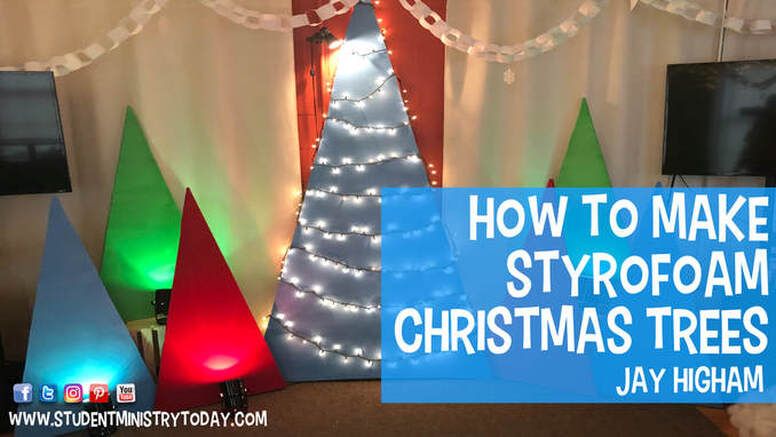
A couple of years ago, when decorating our youth room for Christmas, I wanted to create something special as a backdrop for what we used as our "stage". We don't have a lot of space in our youth room for a large set up, but we did pretty well with a make-shift stage. The area includes speakers, TV monitors for media, some simple lighting, and a table or music stand which I teach from.
As a student ministry, we decided that we would decorate our youth room with an Elf theme. Students cut out snowflakes from white paper, constructed a huge paper chain, and set out to recreate the apartment and store scene. As the centerpiece, I thought it would look cool to have a couple triangular Christmas trees on our stage area.
Not long ago I watched a DIY video by Paul Turner, a fellow youth worker and creator of TheDiscipleProject.net. Paul posted a video that showed how he created some styrofoam letters for the stage/background. It was easy, inexpensive and a great way to add to the atmosphere.
You can see Paul's video, How to Make Styrofoam Letters, by clicking here. Paul's video, along with a pin I saw on Pinterest.com, became the inspiration to my colored trees! Materials list...
Here's what you need for the styrofoam Christmas Trees...
Resource of the month...
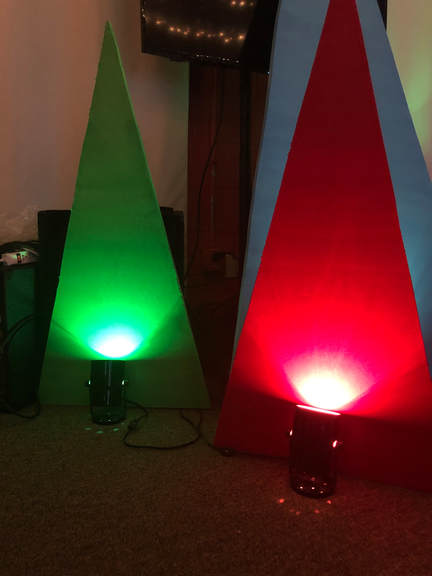
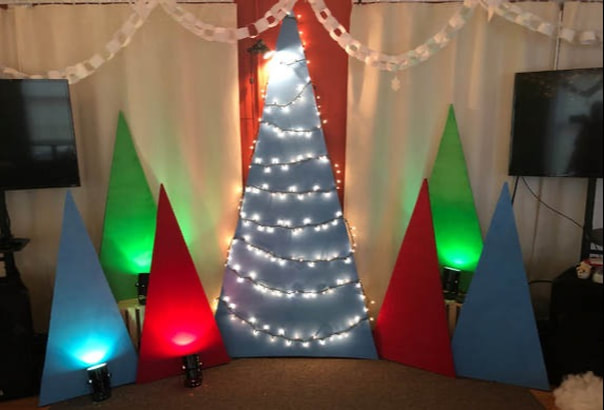
I chose the colors red, green, and blue because I already had colored lightbulbs in red, green and blue. The up lights I already had because it's what we use as part of our simple stage lighting. The colored bulbs help to accent the colored styrofoam.
We decided to wrap the larger, center tree with a string of Christmas lights. It was an idea of one of my students and I love how it came out. I did go and pick up two more lights to light the trees missing lights in the picture.
Constructing the trees was super easy. Total, it took me about 6 hours to construct seven trees. Our students decorated the youth room for Christmas as another student and I set up the trees and all the wiring to create our stage area. Watch the video below to see how I created my styrofoam trees!
Thanks so much for check in for today's blog and DIY video! I hope that you have found the video to helpful and inspiring. I'd love to hear about your Christmas staging ideas and construction tips and tricks! Feel free to leave a comment below. If you have any questions about what I created, hit me up below.
Merry Christmas! - jay
* THIS POST CONTAINS BOTH AFFILIATE AND PRODUCT LINKS,
ALONG WITH LINKS TO THIRD PARTY WEBSITES MENTIONED IN THE POST.*
Since 1999, this week has been a special week. It would begin on Sunday evening. I would lead our Sunday night student ministry gathering, which was also our last youth gathering until Advent Sunday, and wish our students a 'Happy Thanksgiving.' I'd go home, rest and celebrate what God was doing with our students. Monday I would wake, head into the office, run through my To Do List, and clean things up in the office. Mid afternoon I would head home top finish packing and getting ready to go away.
It was the highlight of my year. I looked forward to it every year. It was a staple on my personal and ministry calendar. It was the same week every year. And I couldn't wait for it to arrive. It was the National Youth Workers Convention (NYWC).
From 1999 to 2007, I was an attendee. For 8 years I sat through workshops, seminars, general session speakers, intensives, breakouts, and roundtables. I walked the exhibit hall countless times. I enjoyed the concerts and special activities provided. And I shopped the Convention store, browsing the abundance of resources made available.
Thousands of youth workers filled the various convention centers, hotels, coffee shops, and restaurants of the host city. There was a familiarity; a sense of homecoming as like-minded men and women gathered for a weekend of training, inspiration, challenge, worship, and fellowship. It was one of the greatest weeks of the year.
NYWC shaped so much of how I thought about ministry, family, and life. It taught me vital skills, practical helps, and important habits. I learned the importance of balance, connecting with other youth workers, and healthy spiritual discipleship. I learned how to connect with students, how to share the gospel with students, and how to show up when they needed it most. I learned youth ministry from youth workers.
While on staff I was fortunate to meet and get to know some amazing youth workers. Through interactions with attendees I have hundreds of amazing stories. And I hope that my story and my ministry helped to encourage others I met.
My wife and I were talking last week, and we noted how sad we are that we're not heading to NYWC this year. We really looked forward to that time away.
Will NYWC ever return? I don't know. I would like to think that maybe, someday, we might have the opportunity to serve youth workers in that way again. But, I just don't know. What I do know is that NYWC will forever be a special memory for the both of us. And we will always be grateful for our time attending and volunteering. As for the friendships that were made while serving, I know that they will continue to develop and grow for years to come.
Here's the thing, whether or not NYWC returns, my hope is to highlight what these conferences mean for the youth worker. Over the last couple of years I've noticed a number of "mini" conferences popping up around the country. These conferences offer youth workers a time of training and challenge, fellowship and networking, and a chance to worship together. The smaller scale usually means a more intimate setting, a smaller price tag, and the opportunity to connect with youth workers in your region.
I don't know if we've seen the last of the big conference, as there are still a few of the bigger conferences in operation. But I do like the idea of the "mini" conference. I am planning to attend a couple of these conferences in the new year, including the Northeast Youth Ministry Summit (February 2024), the Youth Leader Summit (May 2024), and the National Day of Volunteer Youth Ministry Training (September 2024). Whether it's the big, national conference or the smaller, local conference, let me encourage you to seek out a conference that will allow you the opportunity for training and growth.
What has been your experience? Have you attended the larger conferences? What did you take away from your time of learning? Have you attended a smaller, more local conference? What were some of the major differences? What did you learn? And which will attend most like attend in the future? Share in the comments below.
- jay
|
AuthorJay Higham is a veteran youth worker of over 30 years; having worked with students in the local church and Christian camping settings. Jay is currently serving as the director of family ministry at a church, located in West Virginia. Jay has been married to Amy for over 25 years. Together, they are raising 5 kids, (4 boys and 1 girl). Jay is an aspiring author, blogger, speaker, vlogger, and social media junkie. He is passionate about student ministry, family ministry, and training youth workers to love and serve their students with passion and excellence. Archives
December 2023
Categories
All
|








 RSS Feed


